General Settings
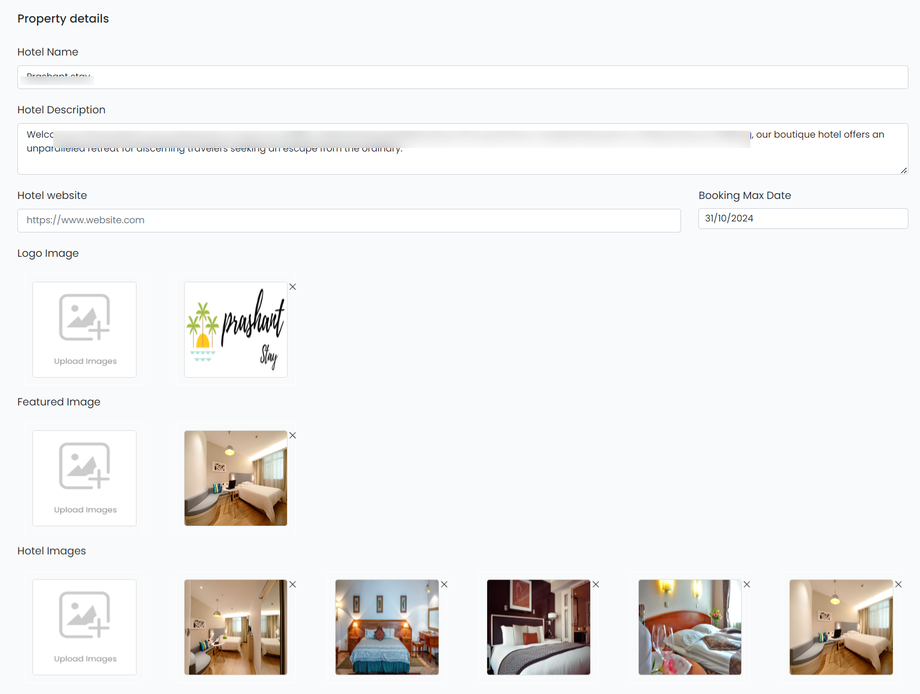
Step 1: Add Property Details:
Ensure you enter proper information about your property, as it will be displayed on the booking engine.
This includes –
-
Hotel Name
-
Hotel description
-
Hotel Website
-
Logo Image
-
Featured Image
-
Hotel Images
Step 2: Property Address & Contact:
Enter the Hotel (property) full address (This will help the traveler to make their decision)
Step 3: Add Google Map:
Enter Google Map Embed Code. (This will help the traveler to find the exact location of your hotel property)
Step 4: Add Miscellaneous:
Here you can add other details which are important in the booking process.
(For Example, Tax details, child minimum & Maximum Age, Check-in & Check-Out Time)
Step 5: Cancellation Policy:
The cancellation policy is an essential aspect of any accommodation booking.
Enter the details as per your hotel cancellation policy
-
Free Cancel before days (Add no. of days)
-
Cancellation Charges – Add a number of percentages (For example, 20%, 30%, 40%, etc)
-
Click on the "Save" button
(This will help you display your cancellation policy for each accommodation)

A well-defined cancellation policy ensures that guests are fully aware of the terms and conditions regarding canceling their reservations. It helps prevent any misunderstandings or disputes by providing clear guidelines upfront. Guests can make informed decisions based on the cancellation policy before booking.
Step 6: Add Property Facilities:
To Add New Facilities, Follow the Below Steps:
-
Click on the "Add Facility"
-
Add the Name and details of your property facility
For example, General Services – Luggage storage, Luggage Assistance, Wake-up Calls, BellBoy service. -
Click on the “Save Changes” button.
Hotel facility information plays a vital role in attracting guests, managing expectations, differentiating your hotel, and ultimately ensuring guest satisfaction. By providing comprehensive and accurate details about your facilities, you enhance the guest experience and position your hotel as a desirable choice in the market.
Step 7: Add Property Rules:
To Add Your Property Rules
-
Click on the “Add Rule” Button
-
Enter the Name and Details of your Property
-
For Example,
Pets – Not Allowed
Id Proofs – Passport, Adharcard, and Driving License are accepted.
Hotel property rules are a crucial role in ensuring the smooth operation of the establishment, promoting guest satisfaction, and creating a welcoming atmosphere for all guests. By adhering to rules, both guests and hotel staff can enjoy a pleasant and enjoyable stay.
Step 8: Nearby / Key Landmark:
To add nearby key landmarks for your hotel,
-
Click on the "Add Landmark Button"
-
Add Name and Distance of Landmark
-
For Example:
Baga Beach – 0.5km -
After adding information click on the “SAVE Changes” Button
Hotel key landmarks provide convenience, attract potential guests, increase occupancy and revenue, generate positive reviews, offer a competitive advantage, and enhance the overall guest experience. Having nearby attractions can be a significant factor in the success and popularity of a hotel.
Step 9: Add Bed Type:
-
Click on the "Bed Type" Button
-
Add the Name of the new bed type (eg. King bed, queen bed, double bed, single bed)
-
Add Description for bed type
For example, King Bed - The regular king-size mattress is the most popular type of king-size bed in the market. This king-size bed size in feet is 6 feet (76 inches) wide and 6.5 feet (80 inches) in length. -
Click on the “SAVE Changes” Button to save your bed type.
Providing bed type details allows guests to choose the option that best suits their needs. This helps you to enhance the overall guest experience and drive positive business outcomes.
Step 10: Add Identity Type Details
Identity-type information is crucial for various reasons, especially in the hospitality industry where personal identification is necessary.
Here are easy steps to add Identity Type
-
Click on "Add New Identity Type"
-
Add the name of the Identity Type that you accept
For example, Passport, Adharcard, Driving License Payment, etc -
Click on “Save Changes”
Step 11: Add Block Accommodation Reason:
Here you can add multiple reasons to block accommodation.
-
To add reason, click on the “Add Block Reason” Button
-
Enter the Name of the Reason
(For example, Reserved, Maintenance, Occupied) -
And click on “Save Changes”


